
FastPass Artwork Best Practices
FastPass artwork must be submitted as high-resolution JPG files to prevent missing fonts and other file issues and keep turn times moving.
FastPass Artwork Checklist
Before submitting artwork, confirm the following:
- ✅ Build your file with .125″ bleeds on each side
- ✅ Convert final artwork to JPG (required)
- ✅ Export at 300 DPI
- ✅ Use CMYK color mode
- ✅ Use Baseline format
- ✅ Use Maximum quality
File Setup
TPI requires FastPass art to be converted to JPG to ensure there are not missing fonts or any other issues.
- Start with a template when possible
- Build your file with .125″ bleeds on each side.
- Use one of the conversion workflows below (Photoshop, InDesign, or Illustrator).
Convert to JPG
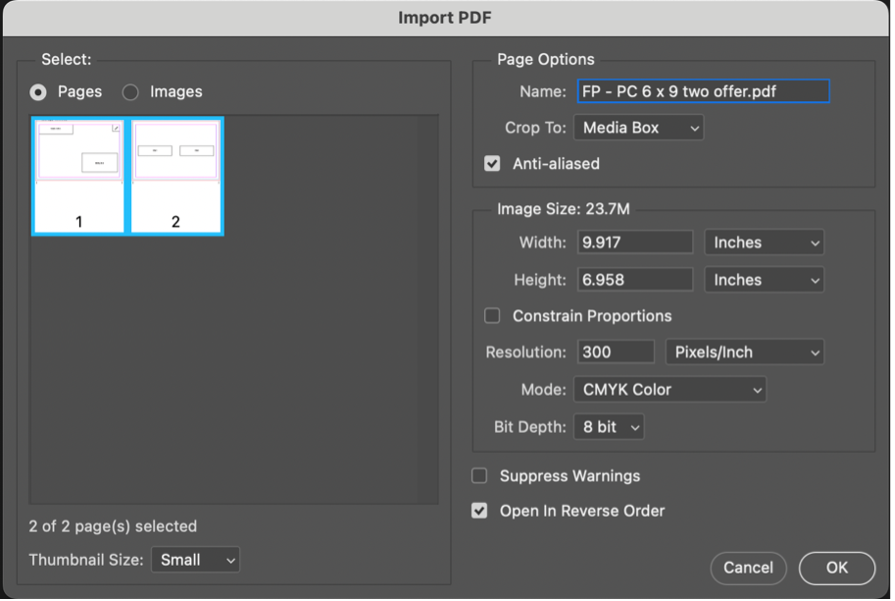
Option A: Convert to JPG via Photoshop
- Drag your Hi-Res PDF into Photoshop and open using:
- Crop to: Media Box
- Anti-aliased: checked
- Resolution: 300 DPI
- Mode: CMYK
- Save as JPG using:
- Quality: 12 (Maximum)
- Format Options: Baseline

Option B: Convert to JPG via InDesign
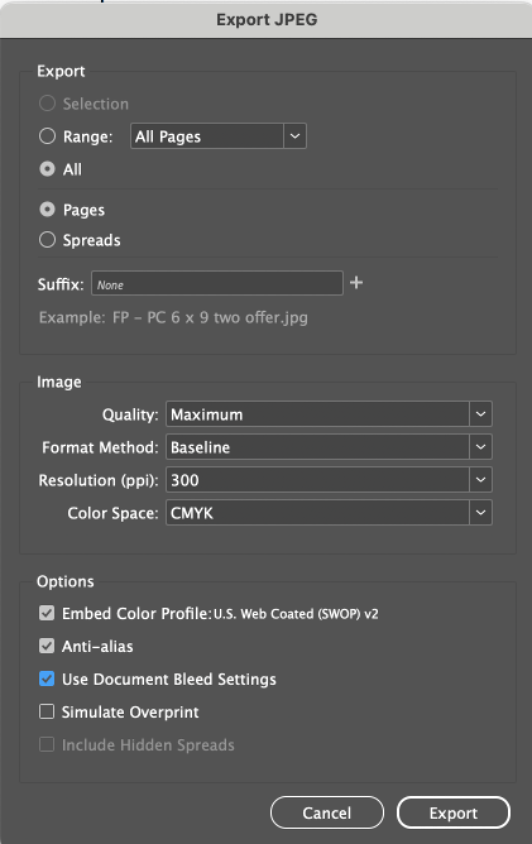
- Go to File → Export
- Select JPG and use these settings:
- Quality: Maximum
- Format Method: Baseline
- Resolution: 300 DPI
- Color Space: CMYK
- Options Checked:
- Embed Color Profile
- Anti-Alias
- Document Bleed Settings
Option C: Convert to JPG via Illustrator
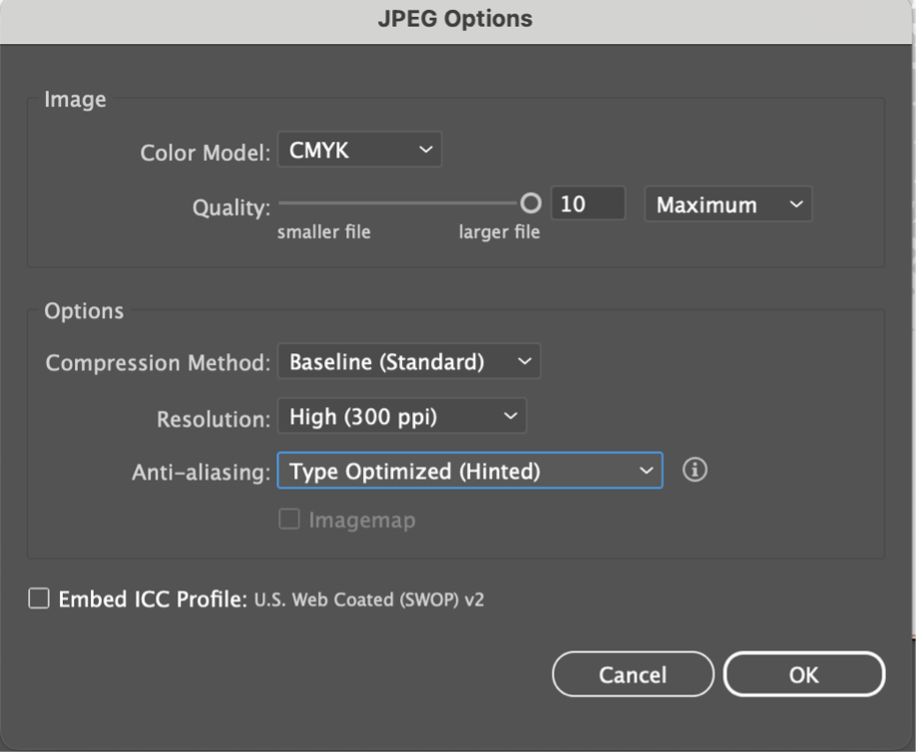
- Go to File → Export → Export As
- Select JPG and use these settings:
- Color Model: CMYK
- Quality: 10 (Maximum)
- Compression Method: Baseline (Standard)
- Resolution: 300 DPI
- Anti-Aliasing: Type Optimized
Questions? We’ll help.
If you have questions while prepping FastPass artwork, reach out to Mat Neely at mat.neely@betontpi.com or contact your TPI Project Manager.